Securing Your React App on Cloud Run for Internal Authenticated Users
28 Dec 2024
Reading time ~3 minutes
Table Of Contents
- Securing Your React App on Cloud Run for Internal Authenticated Users
- Introduction
- Prerequisites
- Step 1: Secure the Cloud Run Service
- Step 2: Create a Serverless NEG
- Step 3: Set Up a Proxy-Only Subnet for VPC
- Step 4: Register a Domain (Optional)
- Step 5: Set Up the Load Balancer
- Step 6: Configure DNS
- Step 7: Enable Identity-Aware Proxy (IAP)
- Step 8: Configure User Access
- Step 9: Test Your Setup
- Summary
Securing Your React App on Cloud Run for Internal Authenticated Users
Introduction
Hosting a React app on Google Cloud Run is simple and efficient. However, restricting access to internal, authenticated users (such as GCP groups) requires additional configuration. In this guide, we will walk through setting up Cloud Run, a Serverless NEG, a Load Balancer, and enabling IAP to secure the React app.
Prerequisites
- A deployed React app on Cloud Run.
- A GCP project with billing enabled.
- A custom domain (optional but recommended for user-friendly URLs).
- Basic knowledge of GCP networking and IAM.
Step 1: Secure the Cloud Run Service
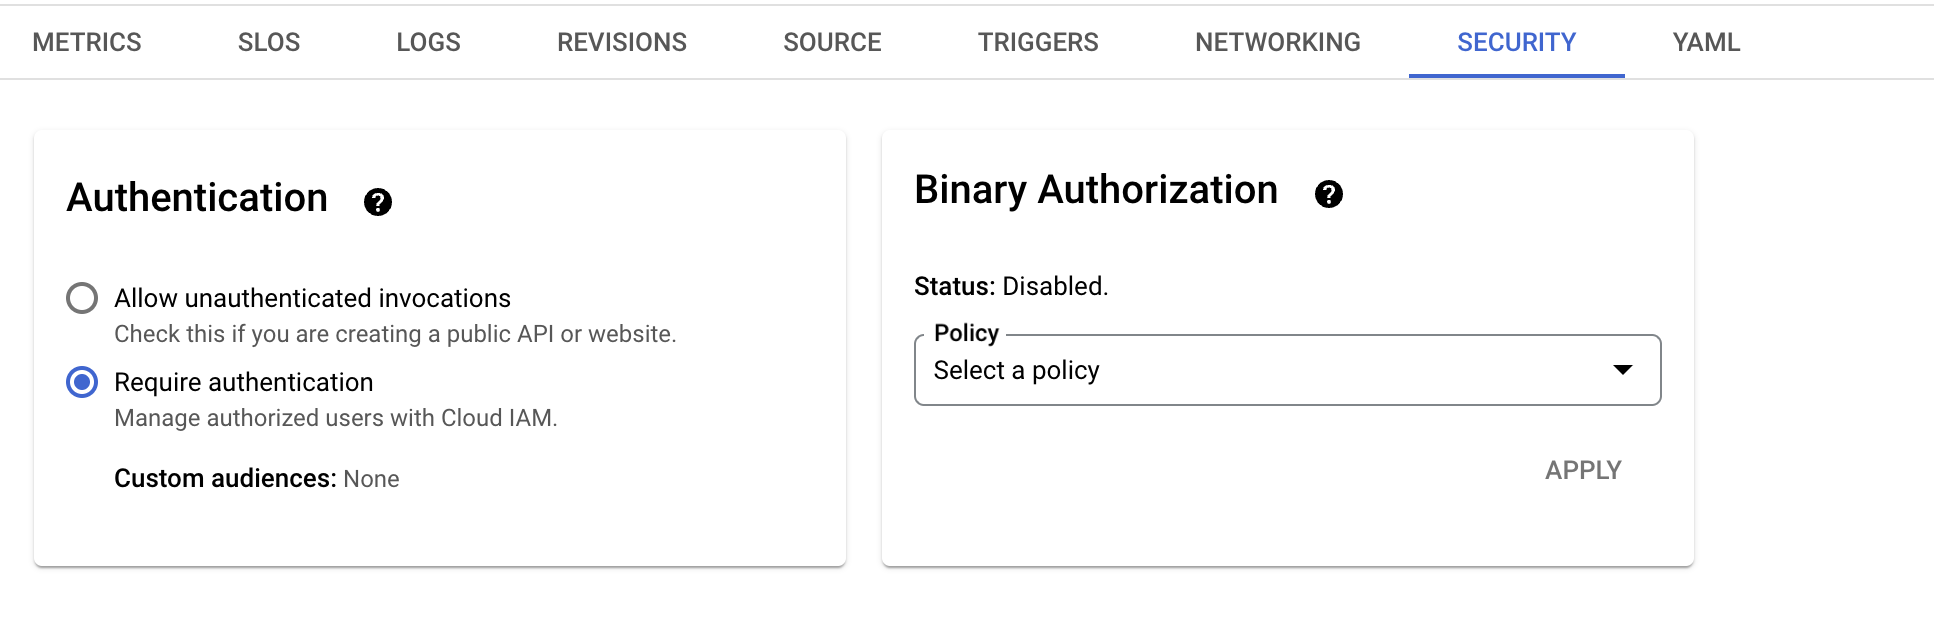
Set the authentication mode of your Cloud Run service to “Require authentication”:
- Navigate to your Cloud Run service in the GCP console.
- Under the Security tab, set Authentication to “Require authentication (Manage authorized users with Cloud IAM)”.
- Save the changes.
This ensures that the service cannot be accessed publicly without authentication.
Step 2: Create a Serverless NEG
A Serverless Network Endpoint Group (NEG) allows integration of Cloud Run with Google Cloud Load Balancer.
Run the following command to create a NEG for your React app:
gcloud compute network-endpoint-groups create neg-react \
  --region=us-central1 \
  --network-endpoint-type=serverless \
  --cloud-run-service=react-app
Replace react-app with the name of your Cloud Run service.
Step 3: Set Up a Proxy-Only Subnet for VPC
To configure a load balancer, you need a proxy-only subnet for your VPC:
- In the GCP console, navigate to VPC Network > Subnets.
- Click Add Subnet.
- Provide a name and choose a region.
- Set Purpose to Regional Managed Proxy.
- Save the changes.

Step 4: Register a Domain (Optional)
If you don’t already have a domain, register one via Cloud Domains:
- Navigate to Cloud Domains in the GCP console.
- Register a new domain and complete the verification process.
- Use Cloud DNS to manage your domain’s DNS configuration.
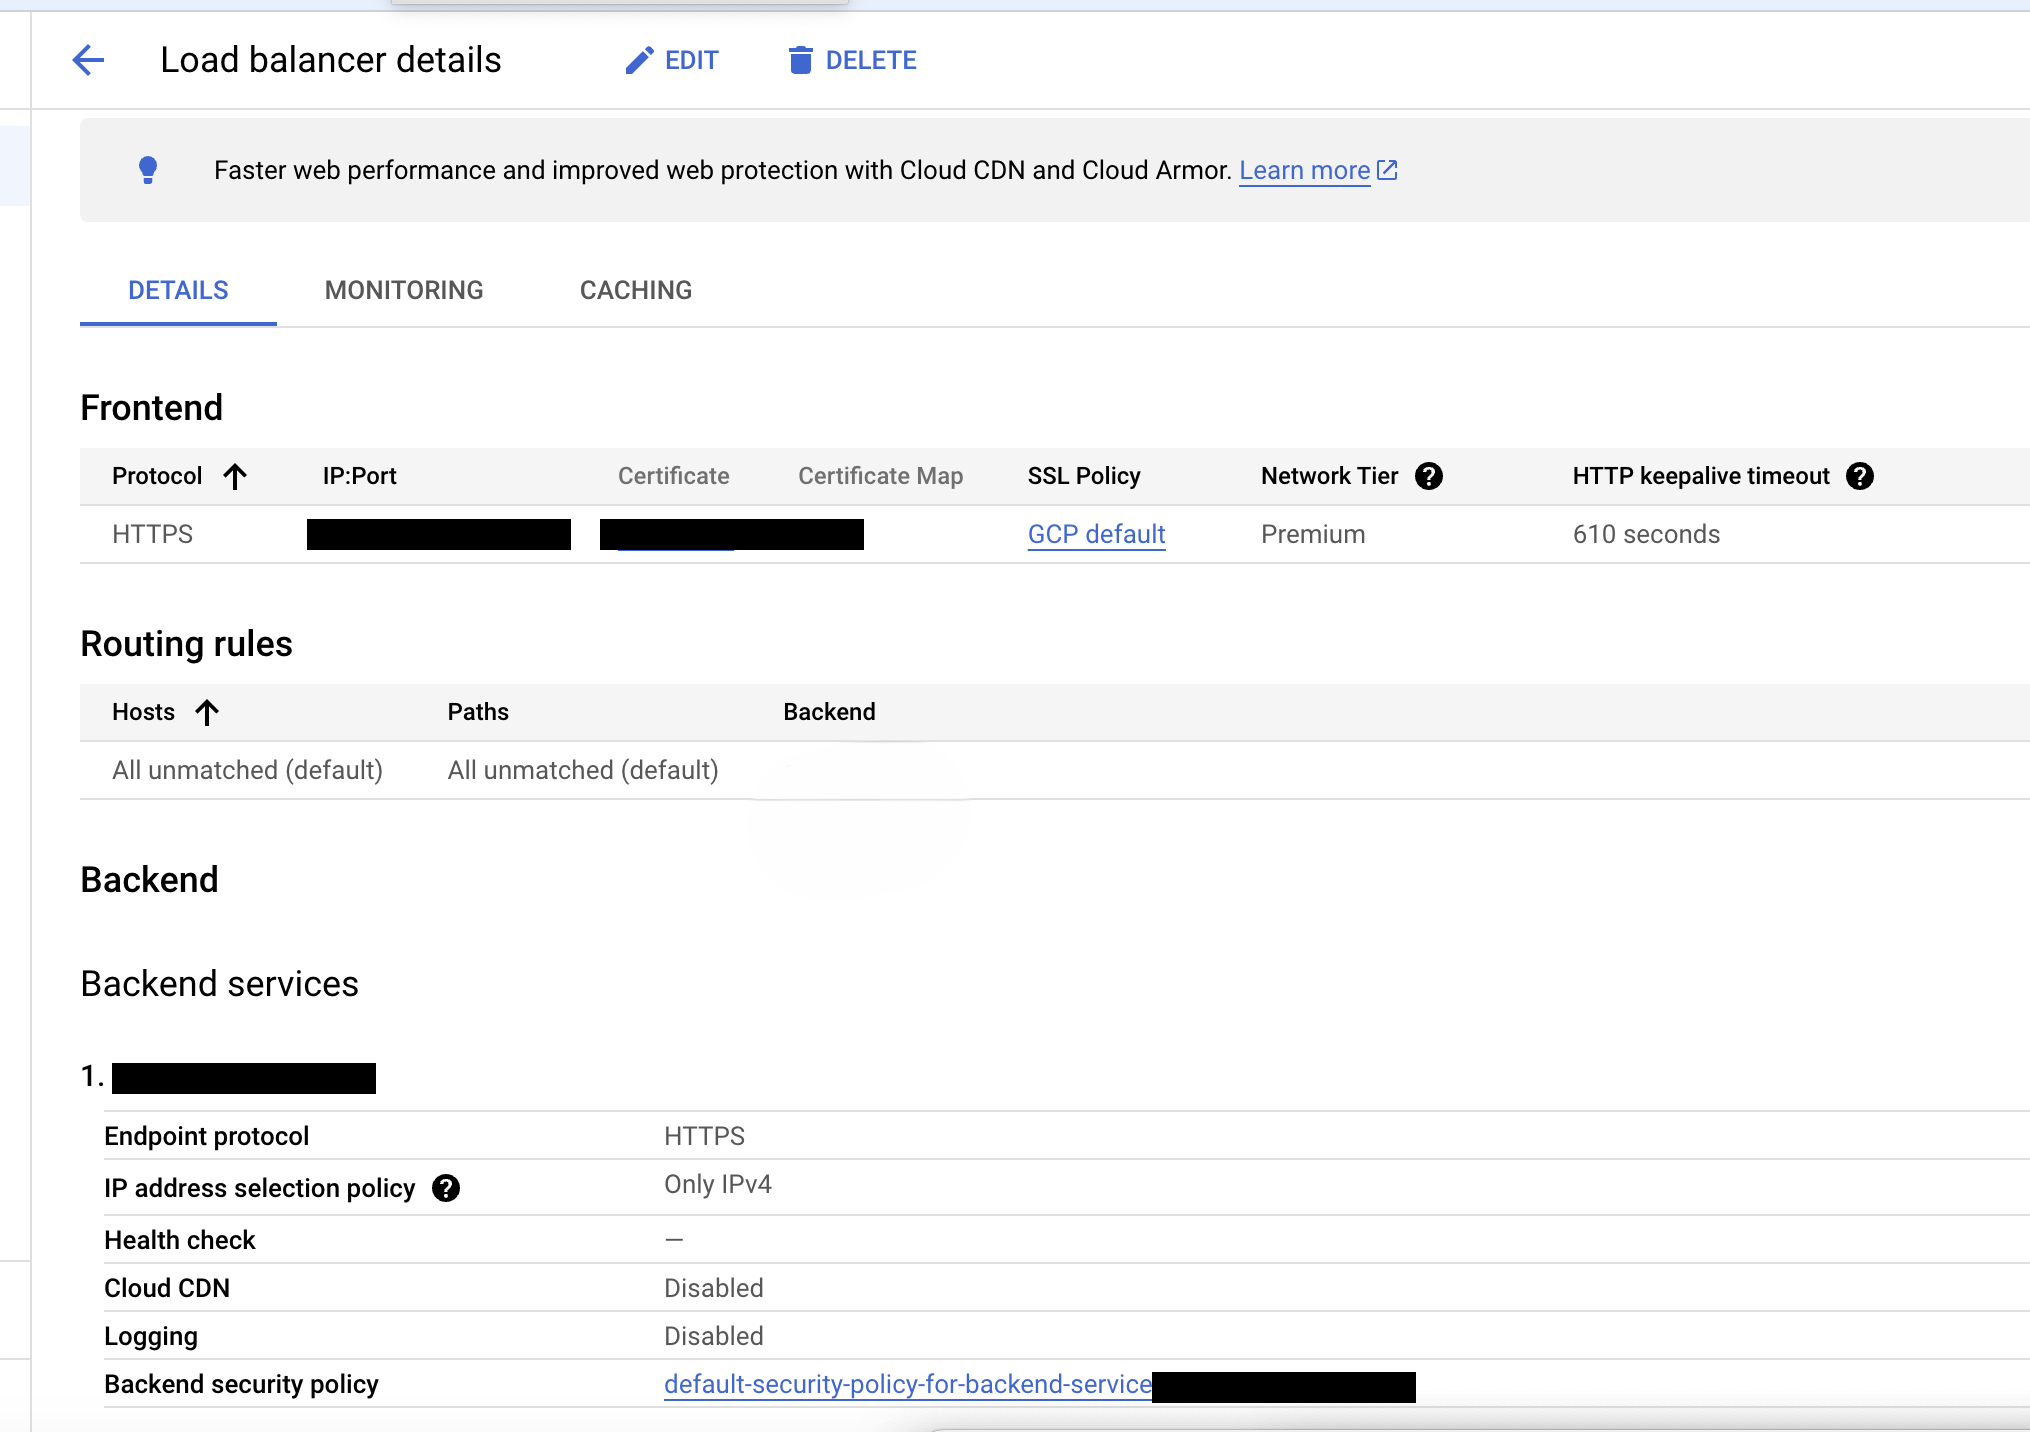
Step 5: Set Up the Load Balancer
Configure a global, public-facing load balancer:
5.1: Frontend Configuration
- Choose Application Load Balancer.
- Set it to Public Facing with Global Deployment.
- Configure HTTPS as the protocol.
- For the SSL certificate, create a Google-managed certificate for your domain (e.g.,
react.example.com).
5.2: Backend Configuration
- Create a backend service and choose Serverless NEG as the backend type.
- Select the NEG created earlier (
neg-react).
5.3: Finalize and Review
Once the frontend and backend are configured, review and create the load balancer. This will generate a public IP for your application.
Step 6: Configure DNS
To map your domain to the load balancer:
- Navigate to Cloud DNS > Zones.
- Create a public DNS zone for your domain.
- Add an A Record pointing to the public IP of the load balancer.
- Example:
react.example.com -> [LOAD_BALANCER_IP].
Step 7: Enable Identity-Aware Proxy (IAP)
IAP provides an additional security layer by authenticating users before allowing access.
- Enable the IAP API:
gcloud services enable iap.googleapis.com - Create an IAP service account:
gcloud beta services identity create --service=iap.googleapis.com --project=${PROJECT_ID} - Grant the IAP service account the Cloud Run Invoker role:
gcloud projects add-iam-policy-binding ${PROJECT_ID} \
  --member="serviceAccount:service-${PROJECT_NUMBER}@gcp-sa-iap.iam.gserviceaccount.com" \
  --role="roles/run.invoker"
Step 8: Configure User Access
To restrict access to a specific GCP group:
- Go to Identity-Aware Proxy in the GCP console.
- Under Applications, find your backend service.
- Toggle IAP to Enabled.
- Add the GCP group as a principal:
- Set the role to Cloud IAP > IAP-secured Web App User.
Users in this group will need to sign in with their GCP credentials to access the app.
Step 9: Test Your Setup
- Access the React app URL (e.g.,
https://react.example.com). - You will be prompted to sign in with your Google account.
- Only authenticated users in the specified GCP group will be granted access.
Summary
By integrating Cloud Run, a Serverless NEG, a Load Balancer, and IAP, you can securely expose your React app to internal users authenticated through GCP. This approach provides robust security, user-friendly URLs, and seamless access management for internal teams.